Project 'frankensteins monster'
-
SP_BOTT
- Oil Injector
- Posts: 706
- Joined: Sun Sep 30, 2007 5:59 pm
-
Howie

- Avgas Sniffer
- Posts: 2055
- Joined: Mon Mar 16, 2009 9:33 pm
- Location: East Yorkshire
The main things you need are an oven, a compressor, the powder coating gun & the powder.
The gun comes with a foot pedal & a little control box. Its the control box that applies a charge to the piece you want to coat, this in turn attracts the powder.
Once the piece is coated, it needs to be very carefully placed into a pre-heated oven (180 c) for about 10-15mins.
Keep an eye on the piece because if its in too long, the shine becomes duller, if its not in for long enough then the powder doesn't flow properly.
Price wise, I paid approx £120 for the gun (few years back). You can get a compressor (that will do the job) quite cheaply now.
A second hand oven £10-20?
The powder costs vary. You can get the cheap stuff off ebay (look for the fishing equiptment sellers) or go to someone like Caswell Europe for the good stuff.
I believe the cost depends on the make up of the powder
The gun comes with a foot pedal & a little control box. Its the control box that applies a charge to the piece you want to coat, this in turn attracts the powder.
Once the piece is coated, it needs to be very carefully placed into a pre-heated oven (180 c) for about 10-15mins.
Keep an eye on the piece because if its in too long, the shine becomes duller, if its not in for long enough then the powder doesn't flow properly.
Price wise, I paid approx £120 for the gun (few years back). You can get a compressor (that will do the job) quite cheaply now.
A second hand oven
The powder costs vary. You can get the cheap stuff off ebay (look for the fishing equiptment sellers) or go to someone like Caswell Europe for the good stuff.
I believe the cost depends on the make up of the powder
-
Howie
- Avgas Sniffer
- Posts: 2055
- Joined: Mon Mar 16, 2009 9:33 pm
- Location: East Yorkshire
-
martin

- Premix Junkie
- Posts: 1610
- Joined: Sat Jan 13, 2007 10:35 pm
- Location: luton,beds
-
Howie
- Avgas Sniffer
- Posts: 2055
- Joined: Mon Mar 16, 2009 9:33 pm
- Location: East Yorkshire
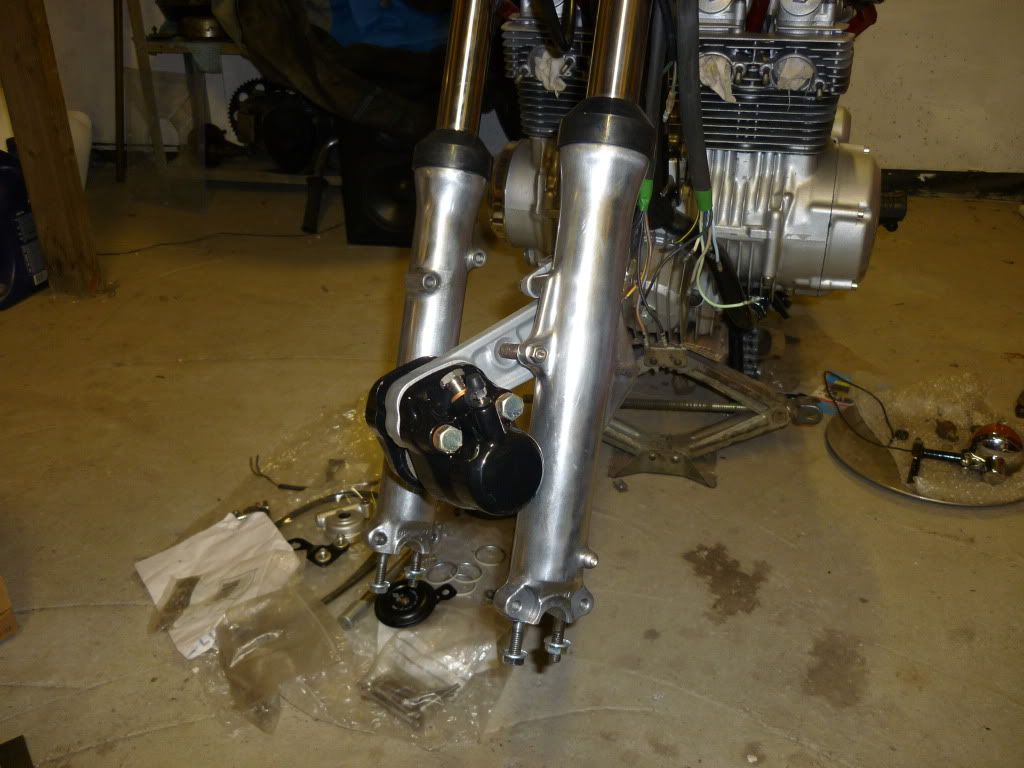
Just got to show you this one. This was the last item I did & its the brake caliper from a Cb400/4 I'm doing for a customer (why do I get myself into these things?)
[img][img]http://i800.photobucket.com/albums/yy28 ... /003-9.jpg[/img]
I'm right proud of it
But those fork bottoms I did look shite
They do look better in the flesh/metal, honestly
[img][img]http://i800.photobucket.com/albums/yy28 ... /003-9.jpg[/img]
I'm right proud of it
But those fork bottoms I did look shite
They do look better in the flesh/metal, honestly
-
john-b
- Oil Injector
- Posts: 605
- Joined: Tue Aug 08, 2006 7:07 pm
- Location: Cheshire
oh yes a 400/4 er pants is the word im looking for, it was so shite i never finished mine i just sold it 
Get a long bolt for the cam chain tensioner and thread the rest to stop it rattling.
Just lucky they run ok when they are knackered
Get a long bolt for the cam chain tensioner and thread the rest to stop it rattling.
Just lucky they run ok when they are knackered
I wish i knew something about KR's so i was like knowledgeable about them and everything like what you lot are 
-
Howie
- Avgas Sniffer
- Posts: 2055
- Joined: Mon Mar 16, 2009 9:33 pm
- Location: East Yorkshire
I couldn't possibly commentoh yes a 400/4 er pants is the word im looking for
I don't think I've ever ridden one
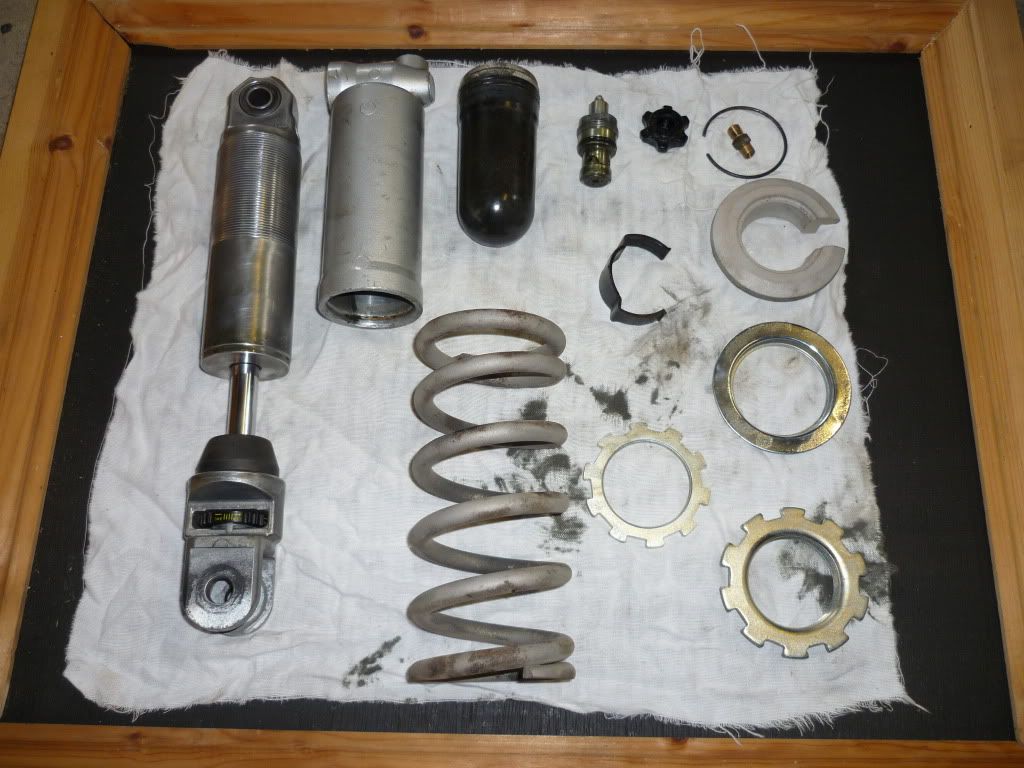
While I'm waiting for my new powder coat colours to arrive, I have stripped my shock.
[img][img]http://i800.photobucket.com/albums/yy28 ... 001-18.jpg[/img]
I'm not going to strip the shock body as its not leaking & the chrome slider is good etc etc.
I do need to finish blasting the spring, then I will strip the reservoir ready for powder coating.
I will actually spend a bit of cash on a new S/S hose for it all once its finished.
My biggest headache is how to finish the shock body.
Can't powder coat it. Don't want to polish it. Paint? Will it look crappy after a year or two? I don't think I can anodise it either.
There is an intresting article on shock rebuilds in this months CMM but they are rebuilding a Marzocchi not a KYB/Showa (who makes the rear shock on the Kr's?)
I'll have a read before reassembly.
-
Tambo

- Heavy Smoker
- Posts: 441
- Joined: Tue Sep 12, 2006 9:10 pm
- Location: Scottish Borders
-
fred
- Oil Injector
- Posts: 926
- Joined: Sat Mar 22, 2008 5:42 pm
- Location: retford n,nott`s working in cotswolds
- Contact:
-
Howie
- Avgas Sniffer
- Posts: 2055
- Joined: Mon Mar 16, 2009 9:33 pm
- Location: East Yorkshire
Got round to doing some more powder coating today.
But instead of posting it here, I thought I would start a new post, just makes it easier to find if anyone else is interested in doing their own.
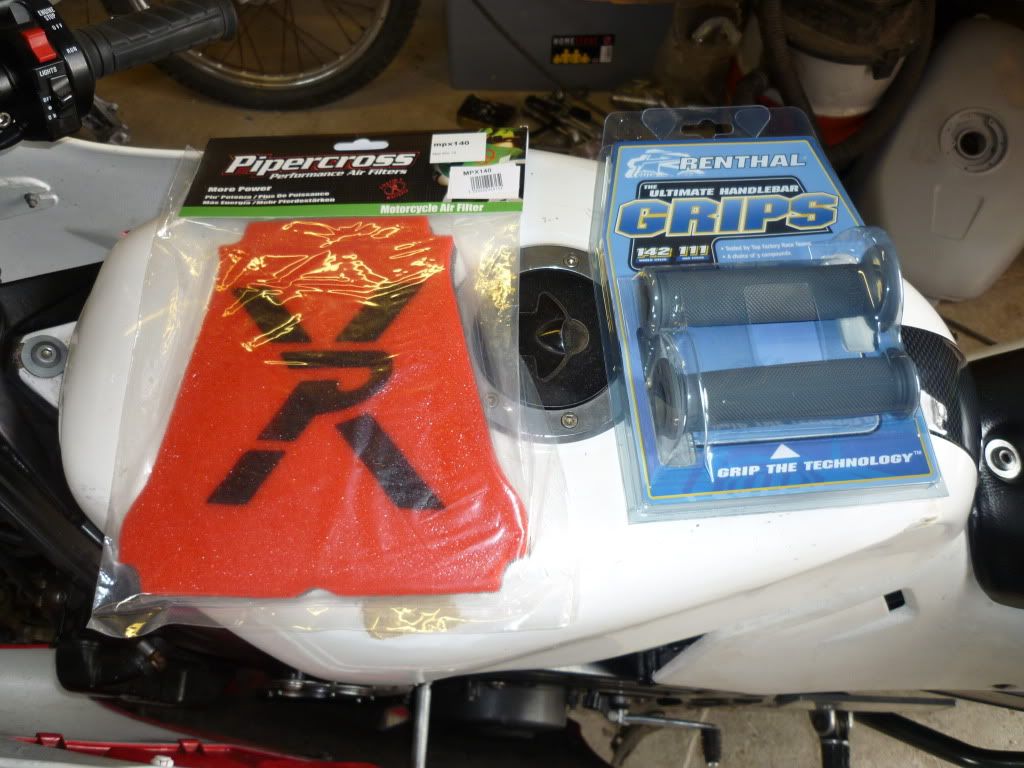
However these came today
[img][img]http://i800.photobucket.com/albums/yy28 ... ie/007.jpg[/img][/img]
I haven't got the patience to save them for the Kr1s project so I popped them on my Kr1
I gave the poor bugger a service today too
I do need to sort out my kips linkages etc etc though. Unfortunately I think mine have had their day
Anyhow, just have a butchers at DIY powder coating, if you're interested
But instead of posting it here, I thought I would start a new post, just makes it easier to find if anyone else is interested in doing their own.
However these came today
[img][img]http://i800.photobucket.com/albums/yy28 ... ie/007.jpg[/img][/img]
I haven't got the patience to save them for the Kr1s project so I popped them on my Kr1
I gave the poor bugger a service today too
I do need to sort out my kips linkages etc etc though. Unfortunately I think mine have had their day
Anyhow, just have a butchers at DIY powder coating, if you're interested
-
Howie
- Avgas Sniffer
- Posts: 2055
- Joined: Mon Mar 16, 2009 9:33 pm
- Location: East Yorkshire
-
Howie
- Avgas Sniffer
- Posts: 2055
- Joined: Mon Mar 16, 2009 9:33 pm
- Location: East Yorkshire
Got my mad professor hat on today & decided to get some of the zinc plating out of the way.
Got my tank set up, plugged my aquarium heater in, lovely, warming up fine then plugged my fish tank bubble maker in.............aaarggghhhh it wasn't working, checked everything, well the fuse anyway.
Bugger......
So being a resourceful practical person, I made this in about 3 minutes.
[/img]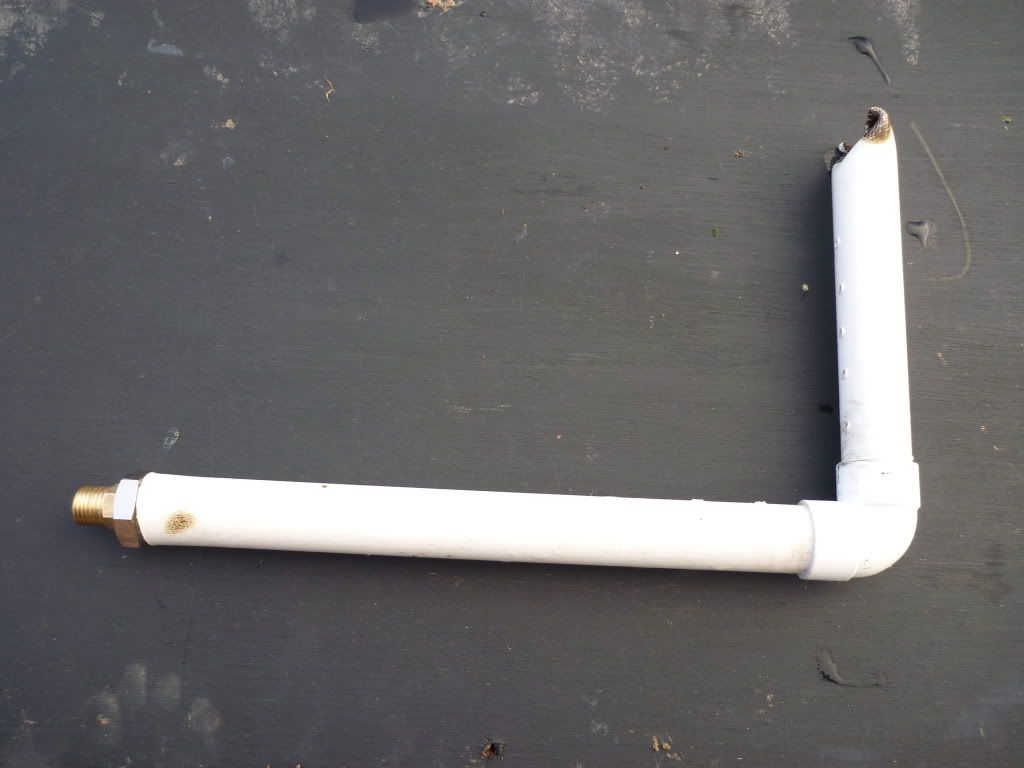
Two lengths of plumbing overflow pipe, joined with an elbow. One end melted over & the other heated to take a half inch to quarter inch reducer, then a quarter inch coupler to connect to a compressor.
Small holes drilled along the O/F pipe & bingo, bubbles galore
So the moral being, if you have a compressor, get yourself off to your nearest friendly plumbers merchant & buy some overflow pipe & fittings, got to be cheaper than an aquarium bubble maker, or what ever its called.
Anyway, end result.......

Shiney stuff, loverly. If you look carefully you will notice some parts are a bit dull.
No its not just the pic, its because I am running low on brightener.
Got my tank set up, plugged my aquarium heater in, lovely, warming up fine then plugged my fish tank bubble maker in.............aaarggghhhh it wasn't working, checked everything, well the fuse anyway.
Bugger......
So being a resourceful practical person, I made this in about 3 minutes.
[/img]
Two lengths of plumbing overflow pipe, joined with an elbow. One end melted over & the other heated to take a half inch to quarter inch reducer, then a quarter inch coupler to connect to a compressor.
Small holes drilled along the O/F pipe & bingo, bubbles galore
So the moral being, if you have a compressor, get yourself off to your nearest friendly plumbers merchant & buy some overflow pipe & fittings, got to be cheaper than an aquarium bubble maker, or what ever its called.
Anyway, end result.......
Shiney stuff, loverly. If you look carefully you will notice some parts are a bit dull.
No its not just the pic, its because I am running low on brightener.
-
Howie
- Avgas Sniffer
- Posts: 2055
- Joined: Mon Mar 16, 2009 9:33 pm
- Location: East Yorkshire
Stripped my engine today. Its the one I rebuilt a couple of years back but because I just wanted my Kr1 on the road, I didn't go for any finesse then
Just seems a shame to bin all the seals I bought.
Anyway, I can take my time now & do it properly. So everything has been stripped back ready for powder coating, everything but the clutch cover, as I can't be bothered to replace the oil level window
So I'm going to polish it
Anyway, after a full day of engine stripping/de-greasing/shot blasting(yes I know, its just I can't afford an aqua blaster & I want to do as much myself as possible!), its now ready for powder coating.
But I ran out of time, so I thought I would take a look at re-sleeving my stator wiring.......................
Here is a short 'how to re-sleeve your stator cables' by Howie
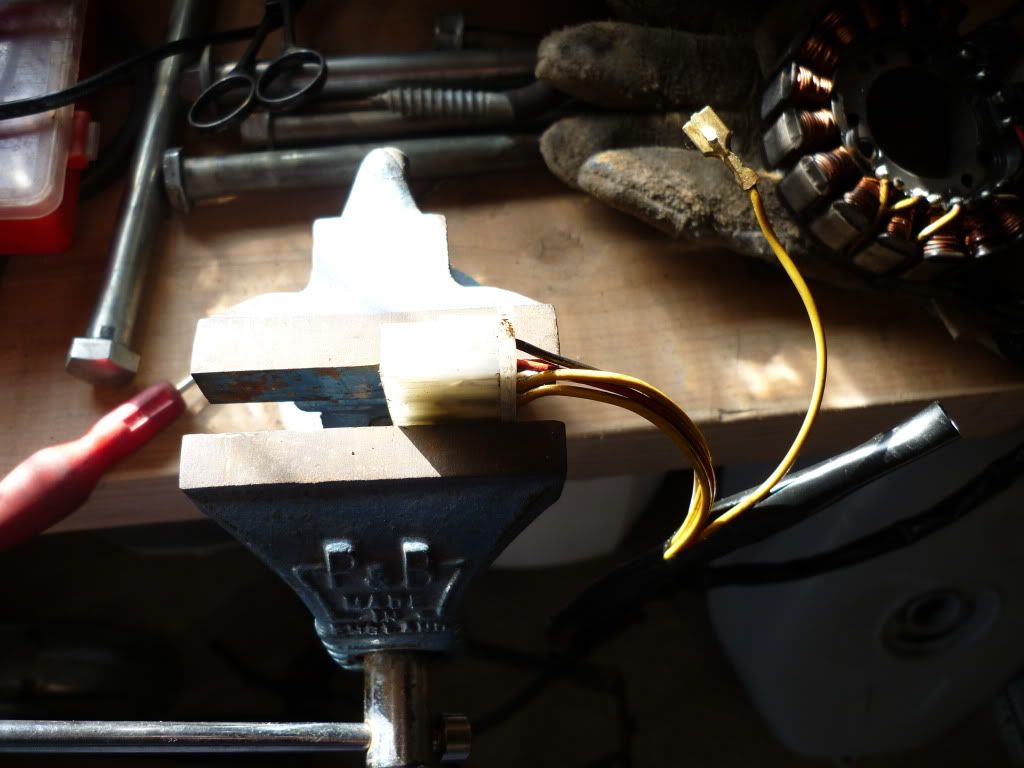
[img][img]http://i800.photobucket.com/albums/yy28 ... /004-8.jpg[/img]
In this first pic, you will see the white connector block, with one wire already removed, note the tang on the spade connector. The original sleeving has been cut back carefully so you can get a hold of the bloody wires.
[img][img]http://i800.photobucket.com/albums/yy28 ... /005-6.jpg[/img][/img]
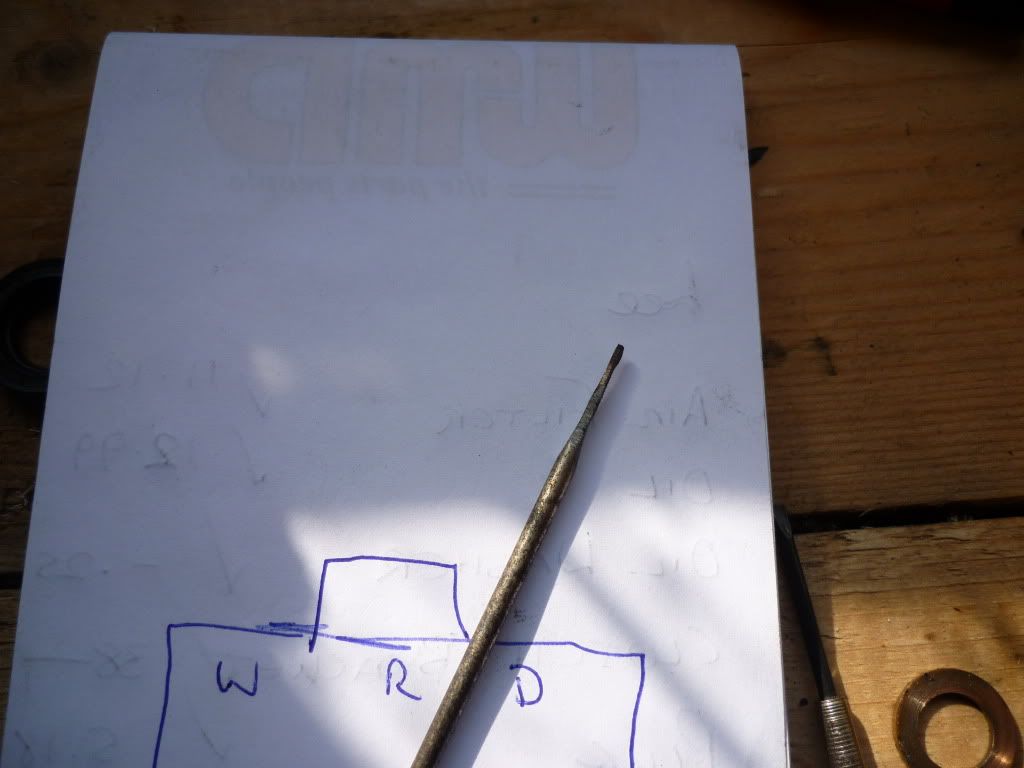
In this next pic you can see my home made, spade connector remover, its just a ground back screwdriver Note the pad underneath, showing where the wires go. I'm not dyslexicticitytic, I just wrote a D instead of B, because I do things like that at times.
[img][img]http://i800.photobucket.com/albums/yy28 ... /006-4.jpg[/img]
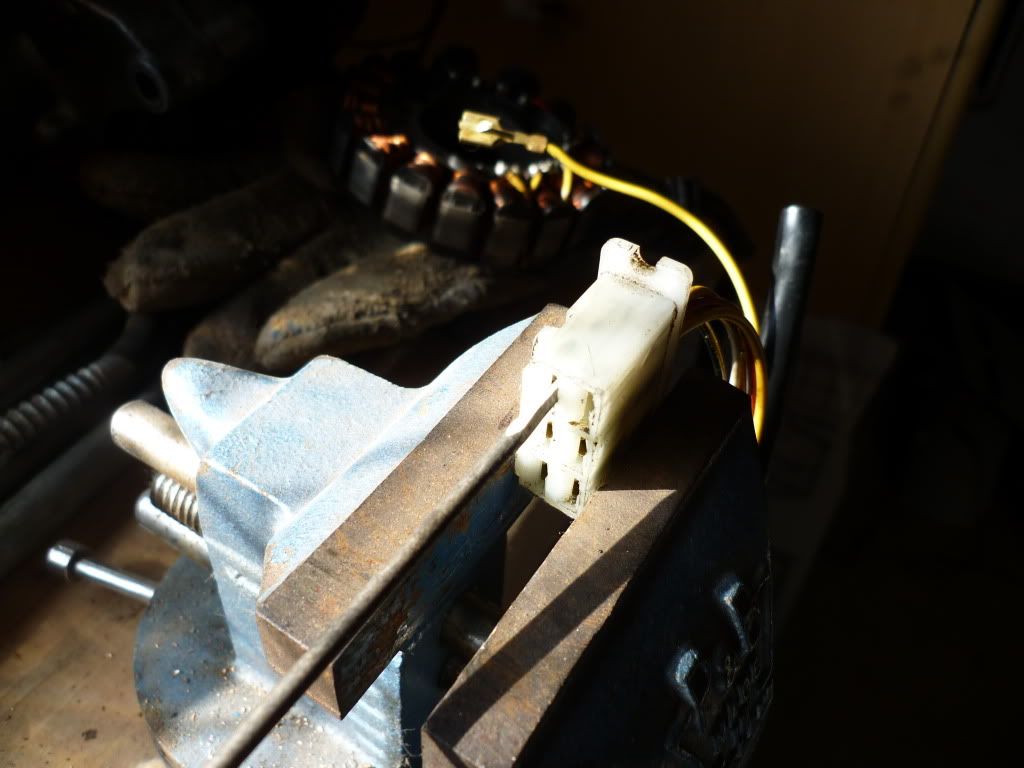
In this pic you can see that the home made connector remover has been gently pushed into the connector block, you will need to push in the opposite direction (against the screwdriver) with the wire. You will feel a little click, this is the tang dis-engaging & you can then pull the wire free.
Once all the wires are out, clean the block, remove the old sleeving, clean the wires & remove any green crap from the spade connectors.
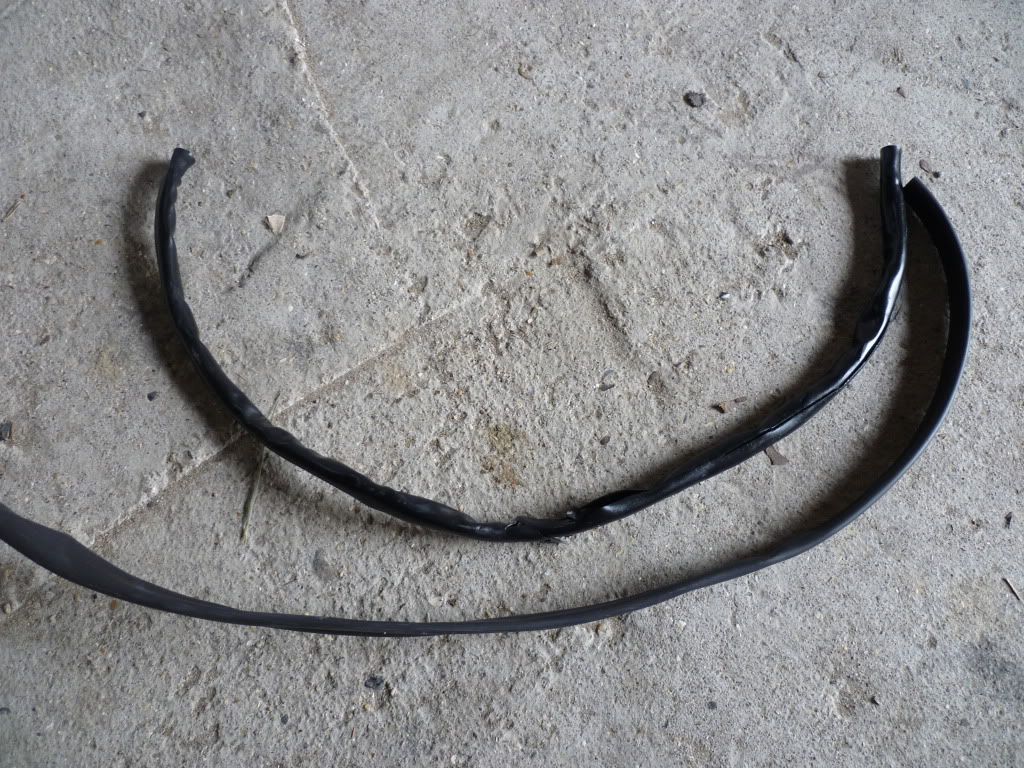
Next cut a piece of new sleeving (using the old sleeve as a guide). Make sure your new sleeving is correct for the amount of wires you are about to shove into it.
[img][img]http://i800.photobucket.com/albums/yy28 ... /007-1.jpg[/img]
The next bit is a pain in the arse, if you're smart you would cut all the connectors off & re attach new ones once its all re-sleeved but I don't have any spade connectors with tangs in at the mo.
I use a silicone spray to make things little easier on this bit. Thread each wire up the sleeve one at a time. Swear, curse & kick the cat a couple of times but persevere & hey presto......
[img][img]http://i800.photobucket.com/albums/yy28 ... /008-1.jpg[/img]
Done, now don't that look better
Just seems a shame to bin all the seals I bought.
Anyway, I can take my time now & do it properly. So everything has been stripped back ready for powder coating, everything but the clutch cover, as I can't be bothered to replace the oil level window
So I'm going to polish it
Anyway, after a full day of engine stripping/de-greasing/shot blasting(yes I know, its just I can't afford an aqua blaster & I want to do as much myself as possible!), its now ready for powder coating.
But I ran out of time, so I thought I would take a look at re-sleeving my stator wiring.......................
Here is a short 'how to re-sleeve your stator cables' by Howie
[img][img]http://i800.photobucket.com/albums/yy28 ... /004-8.jpg[/img]
In this first pic, you will see the white connector block, with one wire already removed, note the tang on the spade connector. The original sleeving has been cut back carefully so you can get a hold of the bloody wires.
[img][img]http://i800.photobucket.com/albums/yy28 ... /005-6.jpg[/img][/img]
In this next pic you can see my home made, spade connector remover, its just a ground back screwdriver
[img][img]http://i800.photobucket.com/albums/yy28 ... /006-4.jpg[/img]
In this pic you can see that the home made connector remover has been gently pushed into the connector block, you will need to push in the opposite direction (against the screwdriver) with the wire. You will feel a little click, this is the tang dis-engaging & you can then pull the wire free.
Once all the wires are out, clean the block, remove the old sleeving, clean the wires & remove any green crap from the spade connectors.
Next cut a piece of new sleeving (using the old sleeve as a guide). Make sure your new sleeving is correct for the amount of wires you are about to shove into it.
[img][img]http://i800.photobucket.com/albums/yy28 ... /007-1.jpg[/img]
The next bit is a pain in the arse, if you're smart you would cut all the connectors off & re attach new ones once its all re-sleeved but I don't have any spade connectors with tangs in at the mo.
I use a silicone spray to make things little easier on this bit. Thread each wire up the sleeve one at a time. Swear, curse & kick the cat a couple of times but persevere & hey presto......
[img][img]http://i800.photobucket.com/albums/yy28 ... /008-1.jpg[/img]
Done, now don't that look better
-
john-b
- Oil Injector
- Posts: 605
- Joined: Tue Aug 08, 2006 7:07 pm
- Location: Cheshire
Cracking job and your doing everything yourself not just bolting on new old stock stuff or parts other people refurbed.
Top stuff a man after my own heart =D> =D> =D> =D>
Besides without wishing to offend anyone and with all due respect with the best will in the world if your bolting on all nos stuff etc and not parts you did your self painting excluded how is it something you restored
Top stuff a man after my own heart =D> =D> =D> =D>
Besides without wishing to offend anyone and with all due respect with the best will in the world if your bolting on all nos stuff etc and not parts you did your self painting excluded how is it something you restored
I wish i knew something about KR's so i was like knowledgeable about them and everything like what you lot are