Yes can't fault it Steve. Managed to spill a small bit on a washer on the fairing - can't get it off now !
Loads left
Careful with your fingers though
KR1S Project
-
Garry

- Premix Junkie
- Posts: 1436
- Joined: Tue Jul 25, 2006 8:01 pm
- Location: E.Midlands
Re: KR1S Project
Smokings Good For You
-
Garry
- Premix Junkie
- Posts: 1436
- Joined: Tue Jul 25, 2006 8:01 pm
- Location: E.Midlands
Re: KR1S Project
Used it on a couple of lugs Steve - works a treat - really strong repair 
Smokings Good For You
-
Garry
- Premix Junkie
- Posts: 1436
- Joined: Tue Jul 25, 2006 8:01 pm
- Location: E.Midlands
Re: KR1S Project
Feel like i can finally start to see the finish at last
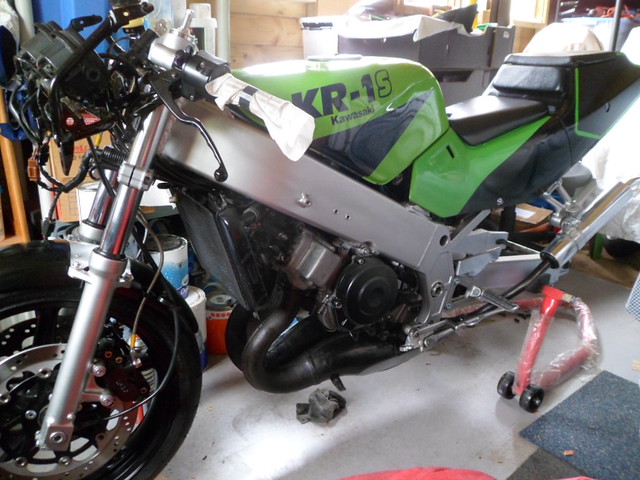
Some bodywork now in place
Need to make some frame brackets and can then get the fairing mounted - will be glad to get it fitted as i keep kicking/knocking it by accident
It starts first or second kick now and ticks over nicely which gives me confidence it should be okay
Have also bought a tyre which i intend to get fitted at the weekend
Once its on wheels i can get all the bikes out and rearrange the shed so its more user friendly
The paint job doesn't look too bad in the shed but once its outside i will have a better idea
Smokings Good For You
-
Binetta Steve

- Oil Injector
- Posts: 949
- Joined: Sat Nov 10, 2012 6:13 pm
- Location: North Wales
Re: KR1S Project
Im loving the plastic wrapping on the axel stands, mine are covered in oil, I would love to know where it comes from, the pipes maybe
Steve
Steve
-
Garry
- Premix Junkie
- Posts: 1436
- Joined: Tue Jul 25, 2006 8:01 pm
- Location: E.Midlands
Re: KR1S Project
Just never got around to removing it Steve
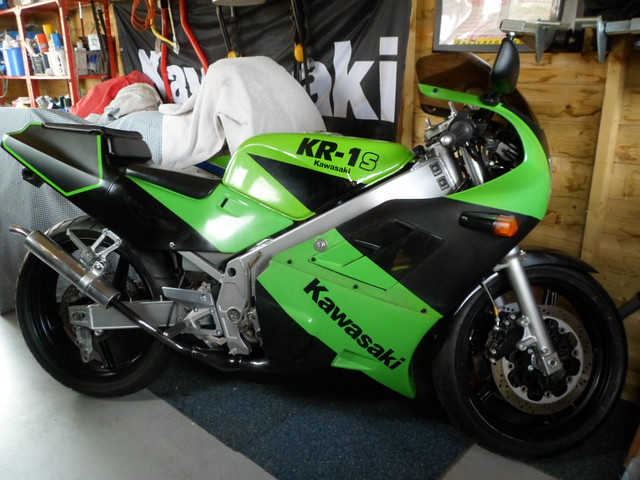
Well essentially it's done now - big sigh of relief
Still needs chain and sprockets, rear brake line and pads, pads for the front and fairing paint needs more wet and dry and polishing. Rest is just
easy stuff.
Has turned out how i wanted, perhaps i can get my life back now
Well essentially it's done now - big sigh of relief
Still needs chain and sprockets, rear brake line and pads, pads for the front and fairing paint needs more wet and dry and polishing. Rest is just
easy stuff.
Has turned out how i wanted, perhaps i can get my life back now
Smokings Good For You
-
500bernie

- Avgas Sniffer
- Posts: 3396
- Joined: Mon Aug 02, 2010 10:22 am
- Location: Teesside
-
Rolex
- Heavy Smoker
- Posts: 183
- Joined: Sun Jun 26, 2016 12:42 pm
Re: KR1S Project
Yes I will second that like the different colour scheme 
-
Garry
- Premix Junkie
- Posts: 1436
- Joined: Tue Jul 25, 2006 8:01 pm
- Location: E.Midlands
Re: KR1S Project
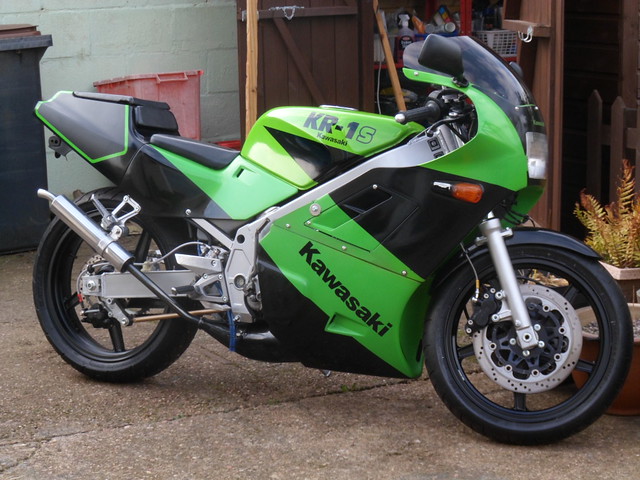
Finished for this year. Just need to fit indicators and chain guard.
Was going to take it for a run up the road but brakes are proving a pain to get pressure so just went up the drive and back.
If anyone has any (non-messy) suggestions for bleeding them without getting the calipers covered in fluid would appreciate them.
If you pump them about 10 times pressure builds and will hold overnight using a cable tie with no leaks so assume it cant be the seals.
Got the same problem on my other S since i have put them back together
If not will wait until spring and hope any air makes its way out by then
Smokings Good For You
-
SP_BOTT
- Oil Injector
- Posts: 706
- Joined: Sun Sep 30, 2007 5:59 pm
Re: KR1S Project
Last time I bled some calipers, I took the lid off, gave the lever very small movements, just enought to operate the brake switch, and I could see the fluid 'sprting' back. By operating the lever loads of times, I could see tiny bubbles entering the reservoir, also tap the brake lines and move the steering lock to lock (or enough so you don't spill any fluid out the res)
This worked for me far quicker than taping the lever to the bars, about 20 mins, from a fully dry system.
This worked for me far quicker than taping the lever to the bars, about 20 mins, from a fully dry system.
-
mellorp
- Heavy Smoker
- Posts: 420
- Joined: Fri Sep 19, 2014 6:44 pm
- Location: South Manchester
Re: KR1S Project
Bleeding brakes I always
1 push the pads back as far as they will go
Connect all the lines
fill reservoir
Release 1 caliper bleed nipple and attach a bleed pipe (into a catch tank)
Start the bleed....
Then open the bleed pull the lever to the bars close the bleed nipple release the lever (repeat 10 times)
bleed the banjo bolt (caliper) surround with tissue then bin it
Then do the other caliper
bleed the banjo bolt (caliper).
Bleed the banjo bolt at the master cylider
Repeat (go back to Start the bleed) but this time repeat until no bubbles and until you get a solid lever
Keep an eye on the reservoir and top up as necessary
Always works for me
-
Garry
- Premix Junkie
- Posts: 1436
- Joined: Tue Jul 25, 2006 8:01 pm
- Location: E.Midlands
Re: KR1S Project
Thanks for the replies. Will let you know how i get on.
Brake fluid seems to get everywhere no matter how careful you are - hate the stuff.
Brake fluid seems to get everywhere no matter how careful you are - hate the stuff.
Smokings Good For You
-
Bertie_Mollie
- Premix Junkie
- Posts: 1328
- Joined: Fri Apr 18, 2008 8:25 am
- Location: Solihull
Re: KR1S Project
I got an old m/c lid and drilled a hole for my eazy bleed. Brick wall brakes in minutes 
GWB KR1s C2 - Now gone 
GWB KR1 - YES IT'S DONE!
ZXR400L PROJECT
AND NO S****Y H****A'S
Usque Ad Mortem Bibendum
GWB KR1 - YES IT'S DONE!
ZXR400L PROJECT
AND NO S****Y H****A'S
Usque Ad Mortem Bibendum
-
JanBros

- Avgas Sniffer
- Posts: 3306
- Joined: Wed Jul 26, 2006 11:50 pm
- Location: the land of Francorchamps
Re: KR1S Project
the reverse collor scheme needs some getting used to but it is looking better every time I see it.
how come the side panel's green is different ?
how come the side panel's green is different ?
My ultimate goal is to die young as late as possible !
-
Garry
- Premix Junkie
- Posts: 1436
- Joined: Tue Jul 25, 2006 8:01 pm
- Location: E.Midlands
Re: KR1S Project
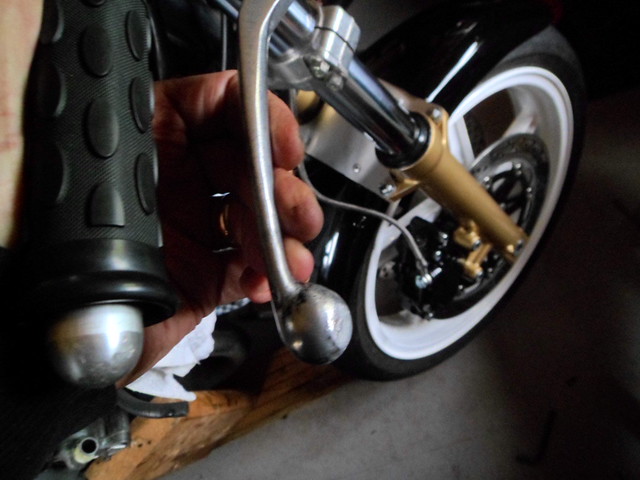
Well getting nowhere with bleeding and sick of the mess - so had a closer look at what was (or wasn't) happening at the calipers
With the anti rattle covers off i could see each caliper had 2 pistons in one half which were some way off making contact with the discs until the lever
was fully applied
So i took the calipers off the forks one at a time , jammed the pistons which were okay in place, and applied brake to force the other pistons out
slightly more
Put them back on and after a few pumps i am now getting pressure
A few more final adjustments required but getting there on this bike anyway - will look at the project next spring
I wonder if the master cylinder can push enough volume of fluid through to move all the pistons out when they have all been pushed back
The KR1 calipers are on a slider but KR1S items seem to rely on piston movement alone for contact with the disc
Anyway big improvement
Regarding the paint Jan you are correct
I am actually colour blind and when i was putting it all together i did not notice the difference in shades - only when my wife told me after
i had finished .
.
I can live with it - the whole project including purchase and van hire stands me at £1100.00 so can't grumble
With the anti rattle covers off i could see each caliper had 2 pistons in one half which were some way off making contact with the discs until the lever
was fully applied
So i took the calipers off the forks one at a time , jammed the pistons which were okay in place, and applied brake to force the other pistons out
slightly more
Put them back on and after a few pumps i am now getting pressure
A few more final adjustments required but getting there on this bike anyway - will look at the project next spring
I wonder if the master cylinder can push enough volume of fluid through to move all the pistons out when they have all been pushed back
The KR1 calipers are on a slider but KR1S items seem to rely on piston movement alone for contact with the disc
Anyway big improvement
Regarding the paint Jan you are correct
I am actually colour blind and when i was putting it all together i did not notice the difference in shades - only when my wife told me after
i had finished
I can live with it - the whole project including purchase and van hire stands me at £1100.00 so can't grumble
Smokings Good For You
-
Garry
- Premix Junkie
- Posts: 1436
- Joined: Tue Jul 25, 2006 8:01 pm
- Location: E.Midlands
Re: KR1S Project
Well had a bit of time today and weather not too bad so had a look at these calipers
Once again there was a set of pistons in each caliper not pushing out enough (pads loose enough to move on pins). Kept the opposing pistons locked in place (used a suitable sized allen key between caliper and pad) and pumped until the problem pistons moved out. Result - brakes

So if you are getting nowhere after rebuilding your calipers, forget fancy bleed kits and brake fluid everywhere just check your pistons are pushed out enough. Looks like it is the inside pistons which always need pumping that bit more.
Just need to wait for a quiet minute to try it up the lane now
Once again there was a set of pistons in each caliper not pushing out enough (pads loose enough to move on pins). Kept the opposing pistons locked in place (used a suitable sized allen key between caliper and pad) and pumped until the problem pistons moved out. Result - brakes
So if you are getting nowhere after rebuilding your calipers, forget fancy bleed kits and brake fluid everywhere just check your pistons are pushed out enough. Looks like it is the inside pistons which always need pumping that bit more.
Just need to wait for a quiet minute to try it up the lane now
Smokings Good For You