
This might take a while!!!
-
DougB
- Oil Injector
- Posts: 590
- Joined: Thu Dec 12, 2013 9:58 pm
- Location: York
Re: This might take a while!!!
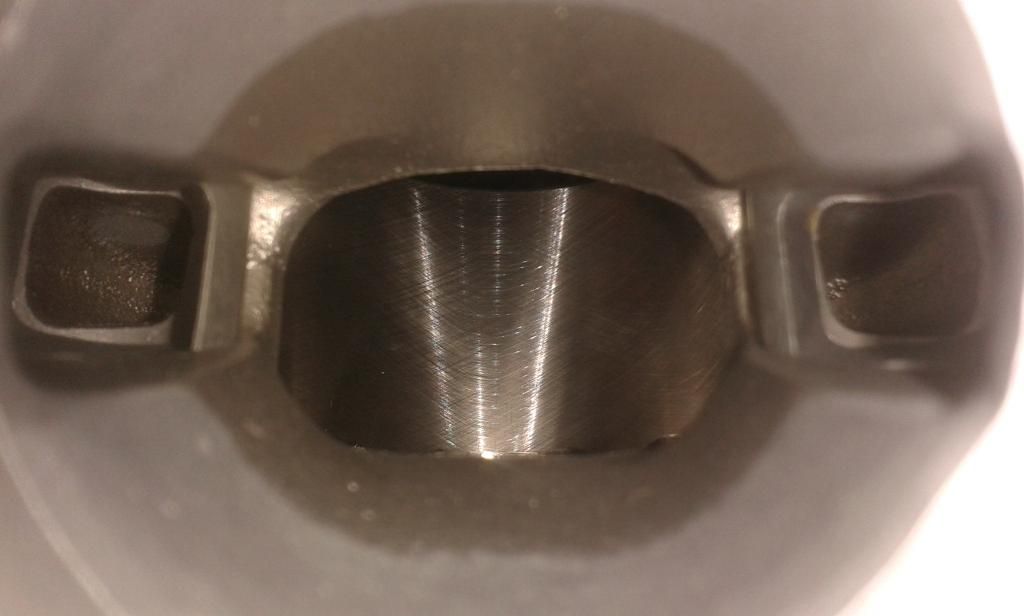
Not sure if this is any clearer but this is with the valves in. Shame the transfer ports don't match the valves very well but at least it steps up to the powervalve window. Still tempted to try and get the dremel into there though 
-
Luders
- Avgas Sniffer
- Posts: 3926
- Joined: Fri Jun 18, 2010 11:29 am
- Location: Oxfordshire
Re: This might take a while!!!
Yep, that's a known mod, match the sub ports to valve and it's clear in the picture now
-
JanBros

- Avgas Sniffer
- Posts: 3306
- Joined: Wed Jul 26, 2006 11:50 pm
- Location: the land of Francorchamps
Re: This might take a while!!!
I don't know, I didn't put it thereLuders wrote:What was that extra bridge for Jan?
probably strenght but aparently it wasn't nescesary.
you've never seen it ? I'll have a look if I still have originals
My ultimate goal is to die young as late as possible !
-
Luders
- Avgas Sniffer
- Posts: 3926
- Joined: Fri Jun 18, 2010 11:29 am
- Location: Oxfordshire
Re: This might take a while!!!
Yeah I've seen them before, just always wondered what it was for.
-
JanBros
- Avgas Sniffer
- Posts: 3306
- Joined: Wed Jul 26, 2006 11:50 pm
- Location: the land of Francorchamps
Re: This might take a while!!!
ok then, just for those who haven't seen it :

My ultimate goal is to die young as late as possible !
-
DougB
- Oil Injector
- Posts: 590
- Joined: Thu Dec 12, 2013 9:58 pm
- Location: York
Re: This might take a while!!!
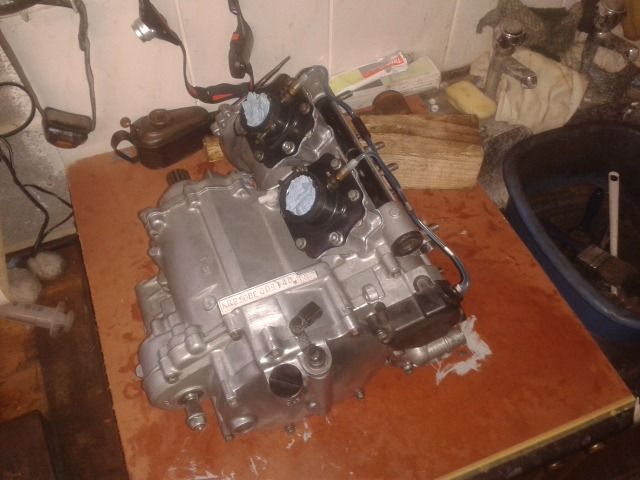
Well the barrels have been put back under the bench for a while, bit more progress on the bottom end to get it sorted just about ready to wrap it up and stick it under the bench for a while.


-
jarno
- Oil Injector
- Posts: 706
- Joined: Sat Aug 08, 2009 9:29 pm
- Location: the netherlands
Re: This might take a while!!!
great looking engine there doug =D>
Kr1s C1 zeus blue
Kr1s c2 black green
ZXR400 SP
ZXR250A
Kr1s c2 black green
ZXR400 SP
ZXR250A
-
500bernie

- Avgas Sniffer
- Posts: 3396
- Joined: Mon Aug 02, 2010 10:22 am
- Location: Teesside
-
DougB
- Oil Injector
- Posts: 590
- Joined: Thu Dec 12, 2013 9:58 pm
- Location: York
Re: This might take a while!!!
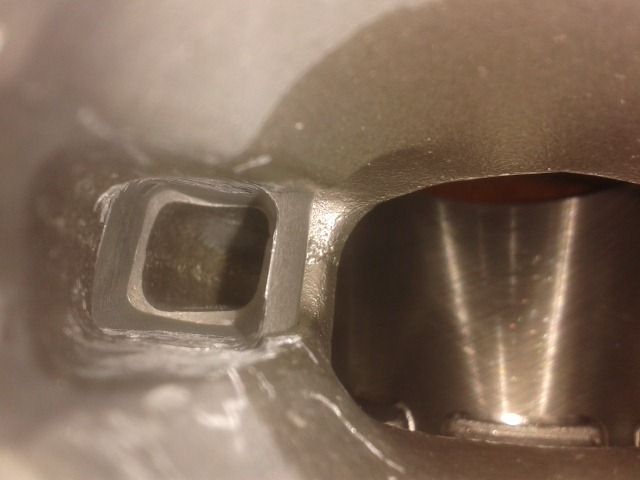
Looked at matching the valve windows up. I can't match the transfer to the valve with the kit I've got but as the valve is bigger and it's a step up for the gas flow so it's not all bad. Then I noticed I can match where the valve meets the exhaust casting, top edge had about a mm step that the gas coming through the valve would hit and the bottom edge was a bit out so at least I think I did a little bit of good..
side I haven't done yet hopefully shows how badly the valve meets the exhaust casting
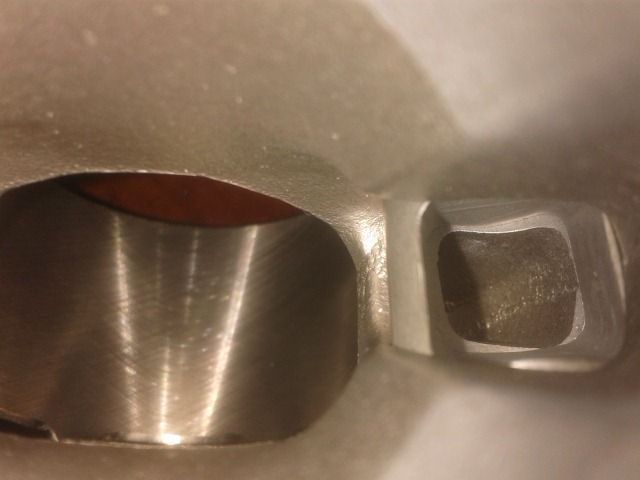
side I have done, pic isn't great but top and bottom do match the casting now (honest!)
side I haven't done yet hopefully shows how badly the valve meets the exhaust casting

side I have done, pic isn't great but top and bottom do match the casting now (honest!)

Last edited by DougB on Sun Jan 04, 2015 11:45 am, edited 1 time in total.
-
DougB
- Oil Injector
- Posts: 590
- Joined: Thu Dec 12, 2013 9:58 pm
- Location: York
Re: This might take a while!!!
jarno wrote:great looking engine there doug =D>
Cheers lads, it's keeping me busy500bernie wrote:Looking good Doug
-
DougB
- Oil Injector
- Posts: 590
- Joined: Thu Dec 12, 2013 9:58 pm
- Location: York
Re: This might take a while!!!
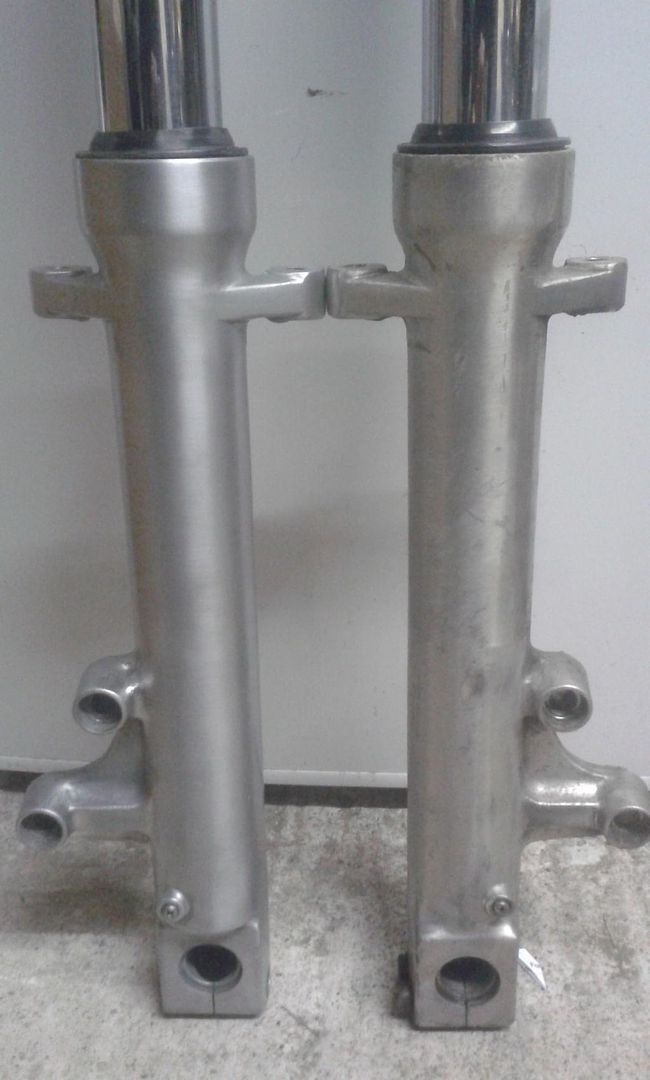
I'm stuck on the engine build again, waiting for some bits to arrive so decided to dig some other bits out.. forks legs needed some "refinishing". One leg done, one to go..

-
500bernie
- Avgas Sniffer
- Posts: 3396
- Joined: Mon Aug 02, 2010 10:22 am
- Location: Teesside
Re: This might take a while!!!
Hi Doug
Nice finish (what did you use)?
Cheers,
Bernie
Nice finish (what did you use)?
Cheers,
Bernie
Firecracker Red and Grey C3 300
-
DougB
- Oil Injector
- Posts: 590
- Joined: Thu Dec 12, 2013 9:58 pm
- Location: York
Re: This might take a while!!!
The original paint/lacquer finish was shot so I took it off with some thinners and really fine scotch bright. Then evened out the alloy surface with emery (some surface of the leg was machined smooth, other areas were still rough cast), took the scratches out with a graded polishing mop then I wanted a brushed finish so more scotch bright (tricky to get an even finish on it). I've used a silicone surface spray and I'm going to see how well it lasts, I'm hoping not to lacquer them again if I can keep them looking right.
-
500bernie
- Avgas Sniffer
- Posts: 3396
- Joined: Mon Aug 02, 2010 10:22 am
- Location: Teesside
Re: This might take a while!!!
There has been no degradation of the polished finish on any of the bits on my bike (hope it stays that way).
I used to use an abrasive impregnated rubber block (called a Loybock) to get a brushed or even a polished finish to quite badly corroded alloy.
I usually finish the surfaces off with a coat of canuba wax, I just wipe the surfaces clean
I used to use an abrasive impregnated rubber block (called a Loybock) to get a brushed or even a polished finish to quite badly corroded alloy.
I usually finish the surfaces off with a coat of canuba wax, I just wipe the surfaces clean
Firecracker Red and Grey C3 300
-
DougB
- Oil Injector
- Posts: 590
- Joined: Thu Dec 12, 2013 9:58 pm
- Location: York
Re: This might take a while!!!
Handy tips! Thanks for the info, had never heard of a loybock or Canuba wax.. Closest I found on a quick search would be this I think?
http://www.amazon.co.uk/Garryson-Garryf ... B0001P08UQ
The Canuba wax was simple enough to find. Both forks need some more attention but I'm happy with them so far and handy to know I've got a good chance of keeping them right.. wasn't in the budget to pay for them to be redone
http://www.amazon.co.uk/Garryson-Garryf ... B0001P08UQ
The Canuba wax was simple enough to find. Both forks need some more attention but I'm happy with them so far and handy to know I've got a good chance of keeping them right.. wasn't in the budget to pay for them to be redone