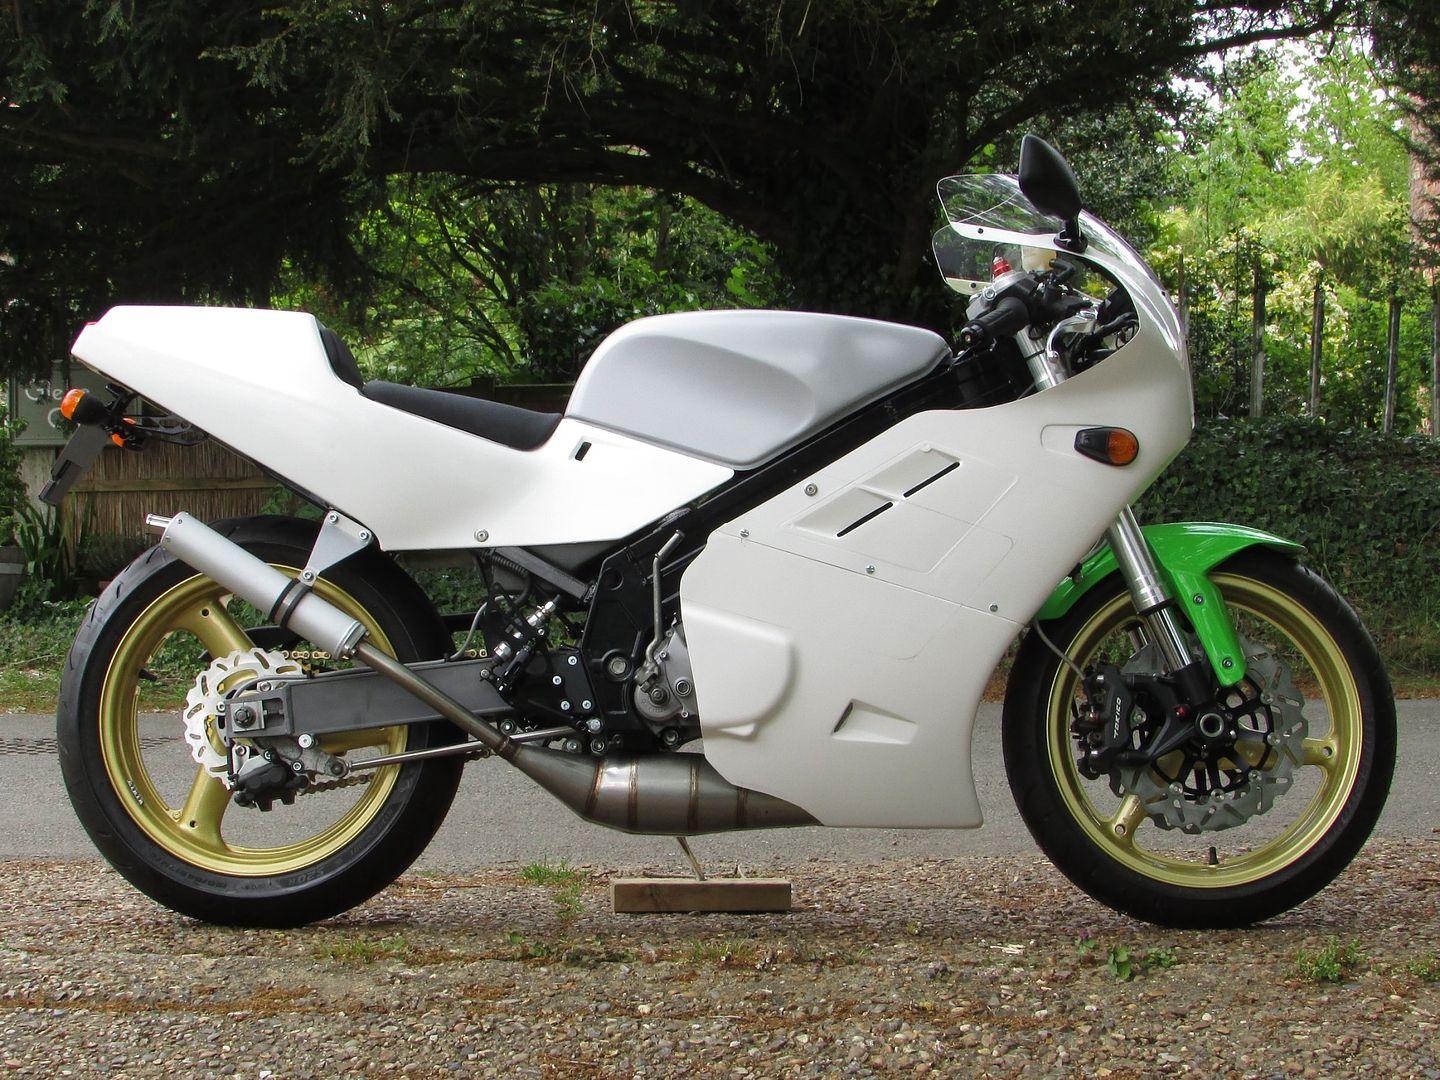
Here`s the first assembly of the complete bike -
Taking it piece by piece -
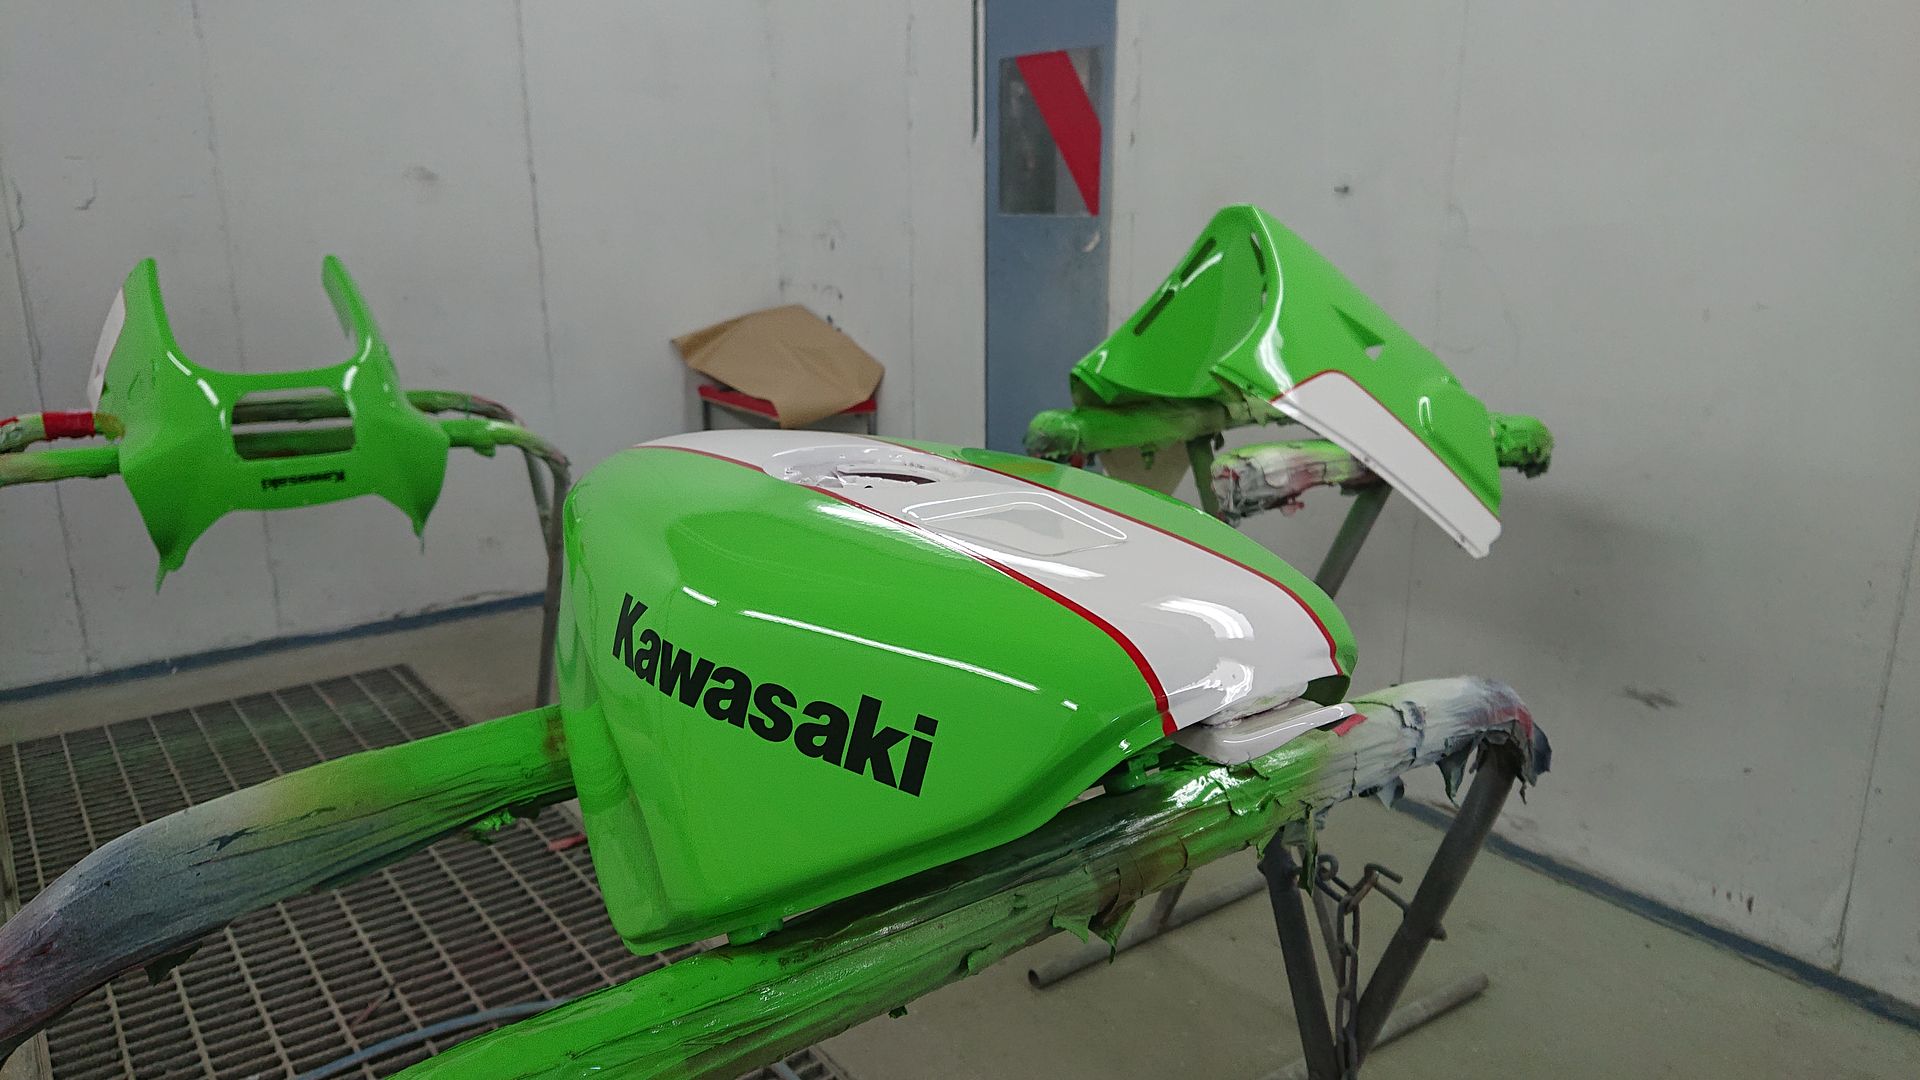
Front mudguard is an OEM ZX-10R unit that I bought from a dealer who was clearing out some NOS parts and uncollected orders - It needed some extra brackets as per my last post to fit the ZX-6R forks, I asked the sprayer to colour match that original Kawasaki green for the rest of the bike.
The tank was another ebay purchase, it was straight, rust-free but badly sprayed in a horrible colour - unfortunately by the time it arrived via courier it had gained three large dents but hey, every cloud has a silver lining, we claimed for the damage and the compensation paid not only to have the dents removed but also get the whole tank filled, flatted, prepped and into primer ready for spraying later.
The seats are stock pads, recovered in black `suede effect` vinyl by the admirable Clive Harrison, master upholsterer and bike enthusiast, who has been refurbishing seats for local bikers for as long as I can remember and whose work is never less than immaculate.
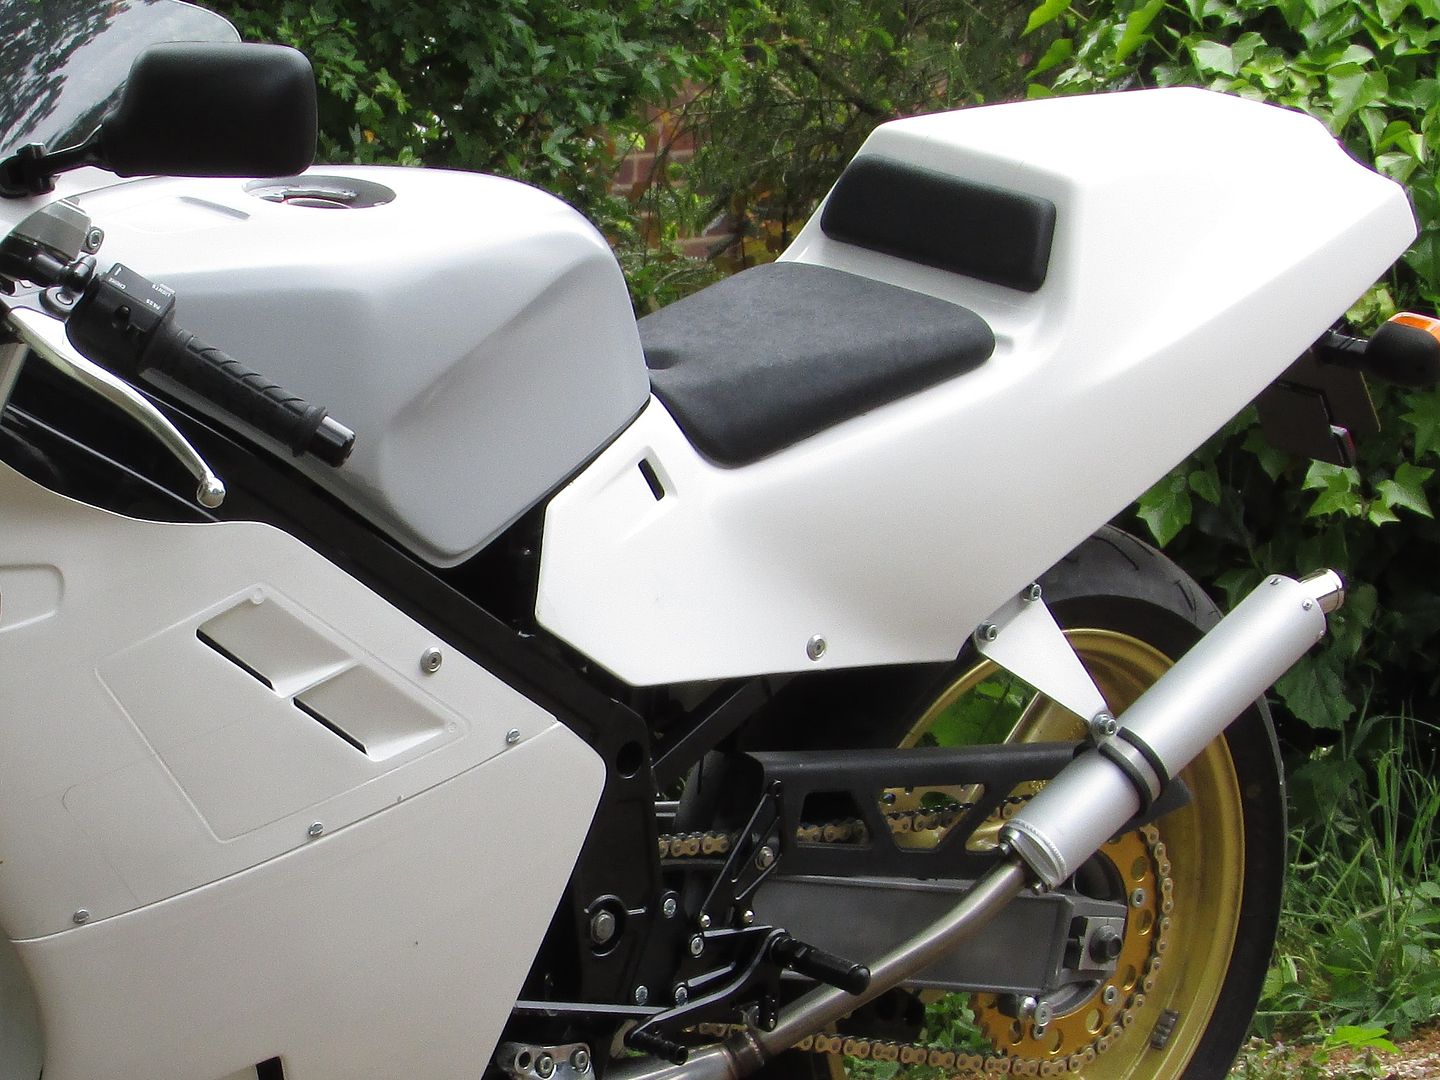
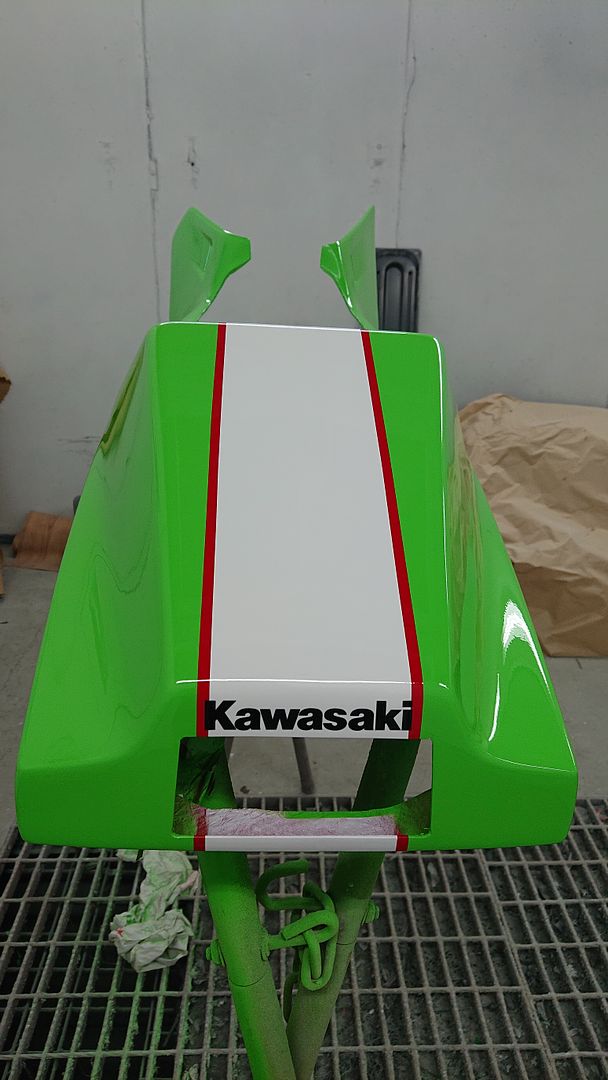
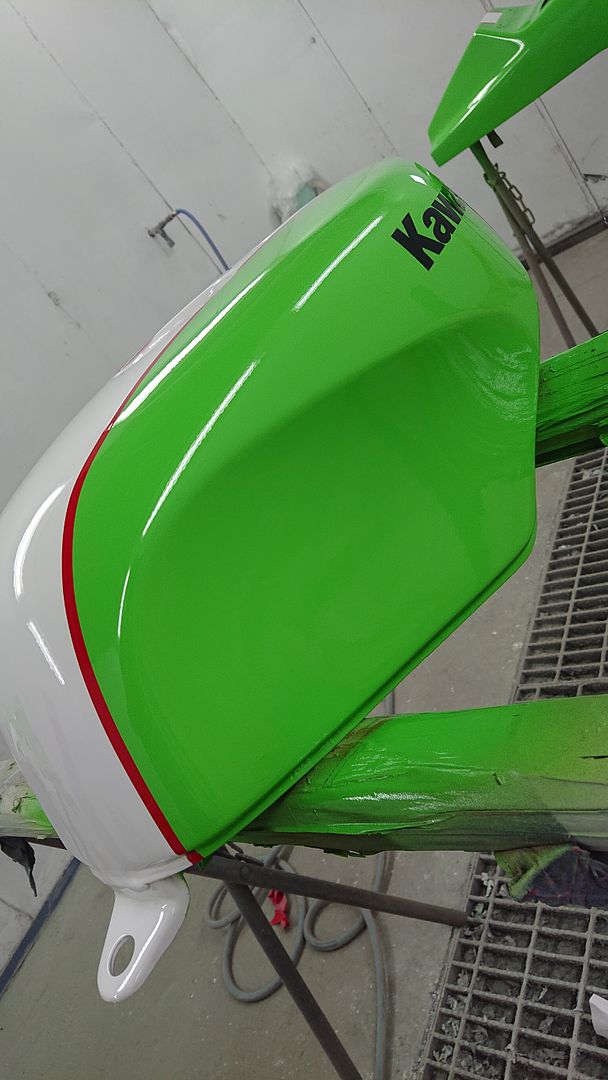
The race body kit came from BB Plastics, chosen because they appear to be the only supplier whose seat mould has a proper curve to the upper surface of the seat hump -
- all the others I have seen go for a simpler `table top` which just doesn`t look right.
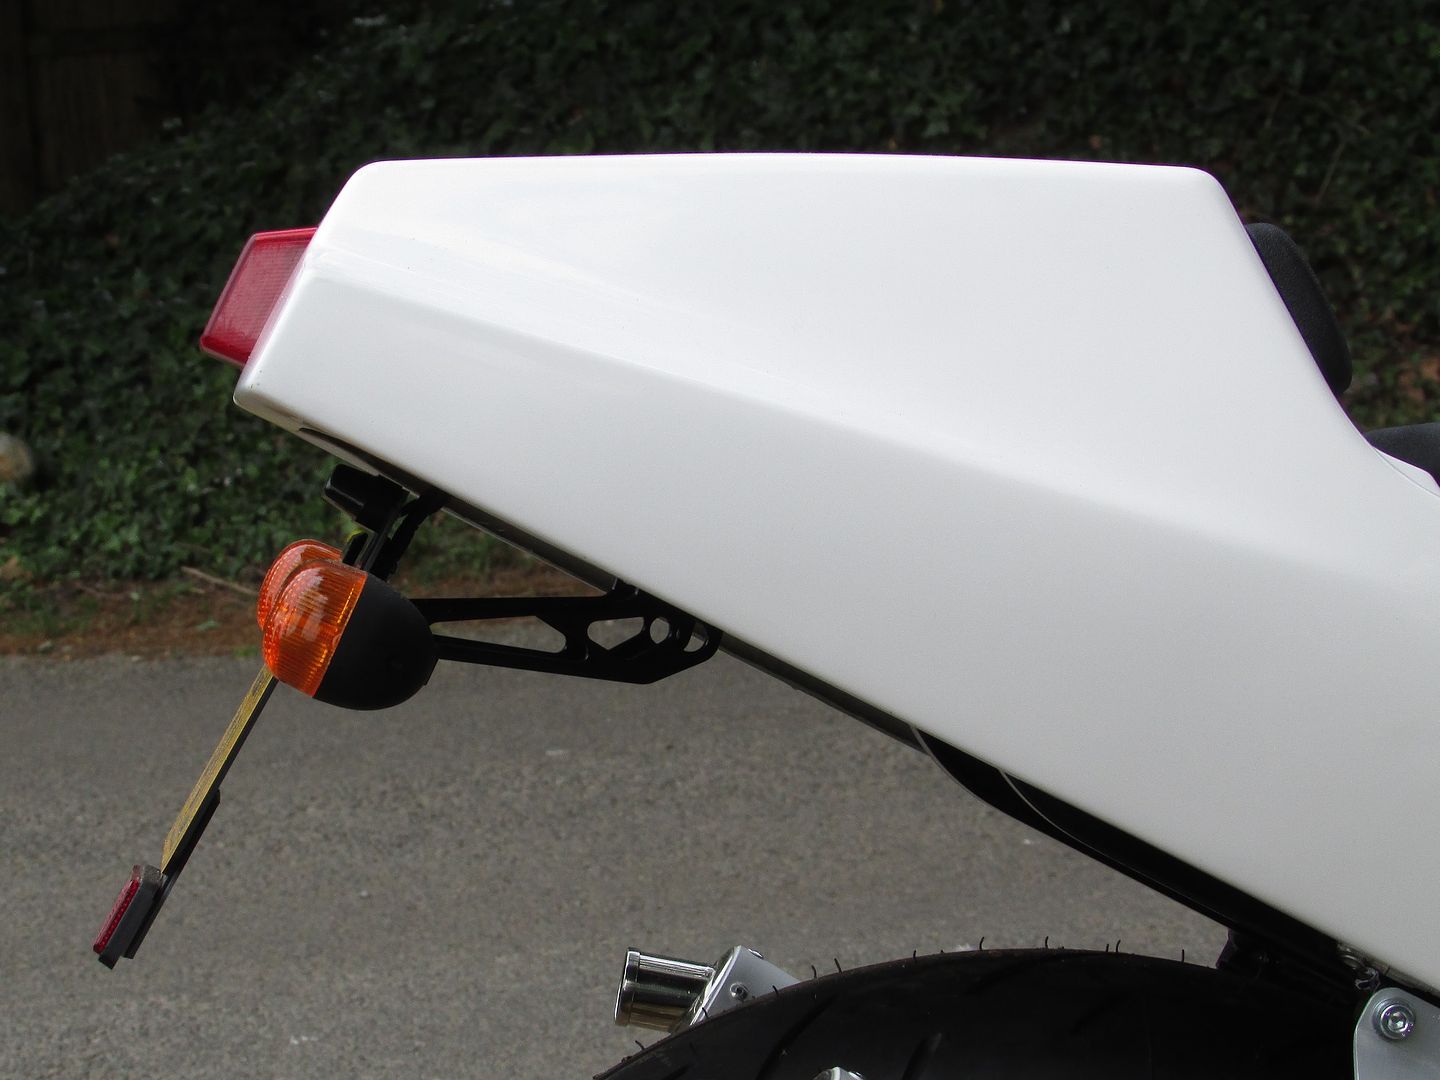
No part of the seat hump/side panel assembly is load bearing so I`ve kept the mounting simple and minimal - the rear light aperture has about 3mm clearance all round and sits on a strip of 3mm thick x 10mm wide dense self adhesive foam around the base of the light lens for a vibration free location, Stainless M6 countersunk Allen screws with specially made small alloy panel washers hold the lower mounting points and the front corners are tagged to the frame with pads of 3M Dual Lock, a kind of industrial strength Velcro.
The fairing is a simple two piece mould from the same supplier - the belly pan needed quite a bit of cutting away to clear the fat JL pipes but the finished result looks quite cool and aerodynamic. I have lined the whole belly pan up to crankcase level with 3 layers of gold heat proof tape as a precaution against scorching the paintwork.
Mounts for the upper fairing are the stock screen/mirror brace and frame side brackets, the belly pan simply fits to the upper fairing with 6 Dzus Panex fasteners and is so light it needs no other support.
I puzzled for quite a while over what to do for the headlamp before coming up with the solution when I found a company who can still supply polycarbonate headlamp protectors for the KR1/S - I ordered one minus fittings or adhesive pads, taped it to the blind front of the fairing, drilled through the corners, marked up, cut out and secured it with 5mm windscreen bolts - the result is light, neat and gives the fairing nose its original, slightly curved contour which looks better than just a flat transparency.
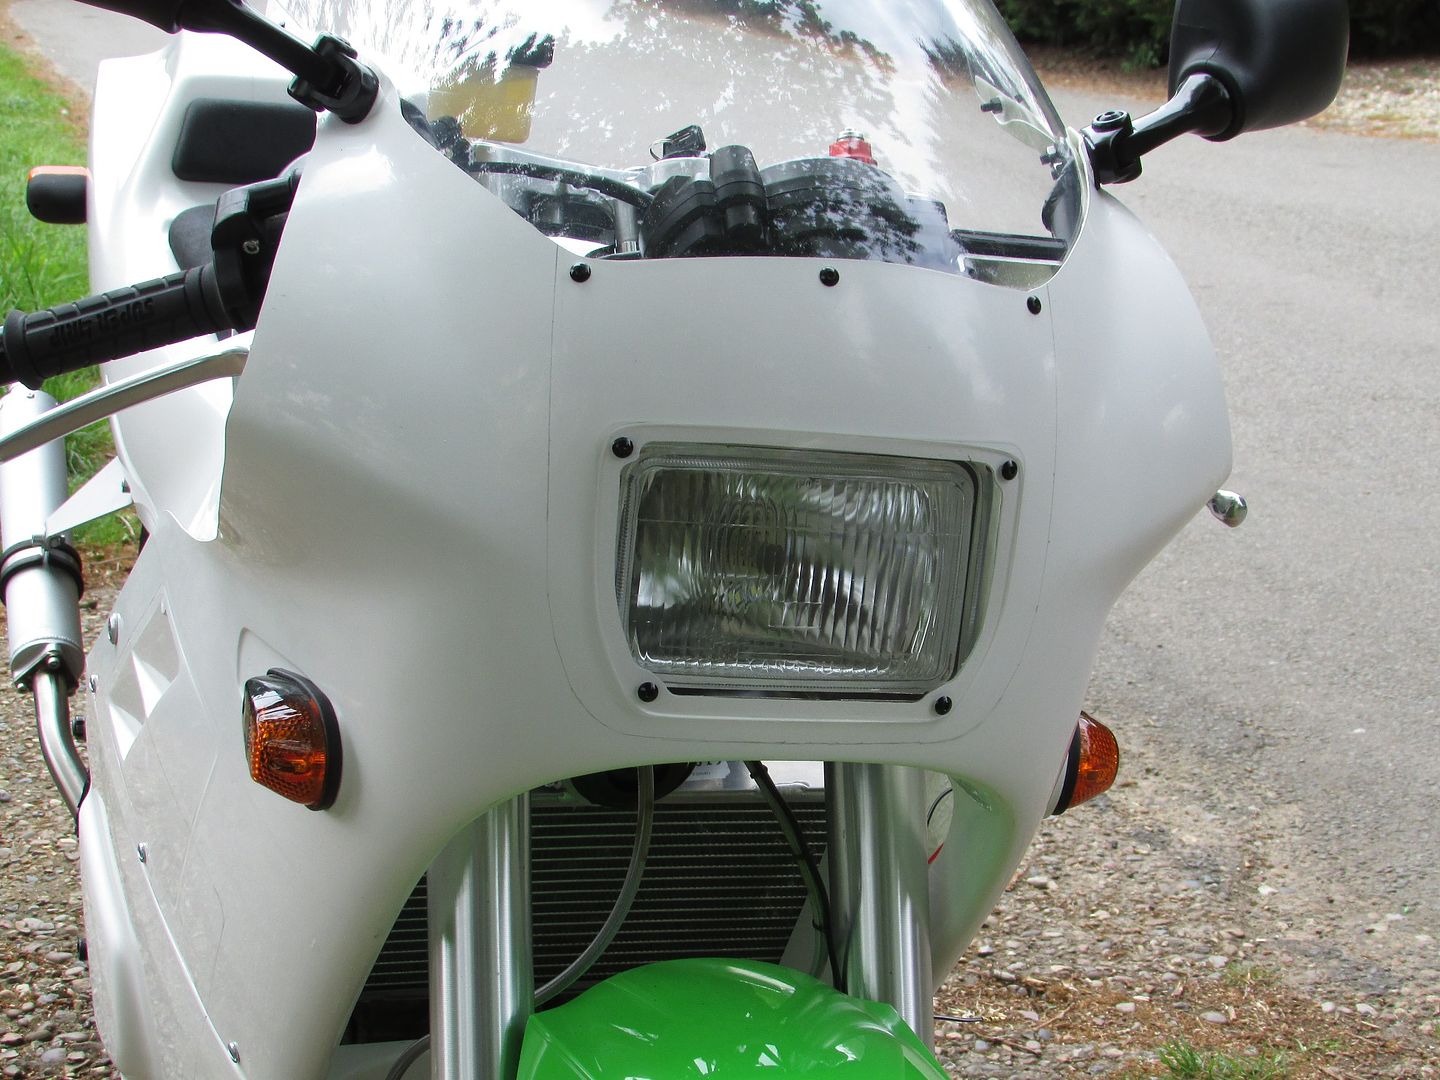
You`ll see from the pencil marks that I was considering a white number board on the fairing nose, but I finally decided against it...
The `teardrop` indicators were a possible fallback position if I couldn`t find stock shaped ones but I did eventually track down a supplier in eastern Europe who had pattern versions of the OEM units.
Various mountings - I`ve mentioned these elsewhere on the forum but I`ll repeat it here -
My friends Richard and Dave at R&D Precision in St. Ives (Cambs, not Cornwall) are both bikers and always up for a challenge so I asked them to make a batch of the NLA KR-1 type fairing mounts - they came up with these (and they are beautiful...)

They also made me a new front seat boss and the top hat spacers for the front and rear tank mountings in shiny stainless - the rear seat mounting rail I constructed myself from a length of 10mm alloy bar and a couple of M6 ring bolts

As far as possible the whole bike has been put together with matching stainless steel flange-headed bolts to give an overall integrated kind of look to it.

 ..
..